Category Archives: Healthy

DIY Shrimp Broth – super easy and much cheaper than store-bought

Standard

I hate to let things go to waste… so when we are shucking prawn shells for a meal, I like to save the shells to make a shrimp broth. I place the shells in a Ziploc freezer bag, and store them in the freezer until I have enough to make up a few batches of broth.

Easy DIY Shrimp Broth - what else are you going to do with those leftover prawn shells?

Easy DIY Shrimp Broth – what else are you going to do with those leftover prawn shells?

This easy shrimp broth recipe was the base of flavour for my recent experiment in making my Shrimp-Flavoured Quinoa Pilaf which I will post tomorrow.

In making any type of broth, you can pretty much do a fridge-cleaning on whatever vegetables you have hanging around. In this version I used asparagus ends, onion chunks and long celery spears. Then I flavoured the broth with 1 tsp. of sea salt, 1 tsp. of peppercorns, and chunks of fresh garlic.

1. Throw your prawn shells (frozen or thawed) into a large soup pot,
add veggies and spices of your choice.

2. Cover everything with hot tap water. Put on your stove on
High to boil the mixture, then reduce heat to a simmer.
Allow the flavours to meld for a couple of hours (or more).

3. Place a large bowl or measuring cup under your colander to catch the broth
(something I always forget to do – almost), and pour the contents of your pot into the
colander to strain off the prawn shells and veggies.

Use this broth for Asian-inspired soups, seafood stews, mussels, or to flavour your favourite rice dishes. This broth also freezes well in handy-sized 1 cup Ziploc containers for future use.

__________________________________

What types of homemade broth do you make?

What to do with leftover Ahi Tuna? Make a great salad!

Standard

I was very lucky last summer to win a gift card to our local fish monger, Gimli Fish Market. I’d actually never shopped there before, but for a special pre-holiday meal with friends last month, I took the fish-lady’s recommendation to try cooking Ahi Tuna at home.

This is what a 1kg of tuna looks like - those plates are 8.5 inches wide. That's a lotta YUM!

This is what a 1kg of tuna looks like – those plates are 8.5 inches wide. That’s a lotta YUM!

I’m so glad I listened to both the expert fish-lady, and to one of my fellow food bloggers, Rheanne Marcoux of Sucre & Farine to try Food & Wine Magazine’s Sesame-Crusted Tuna Steak recipe. It was delicious and super simple. Prep time and cook time together were less than 10 minutes.

Sesame Crusted Tuna Steak (on the right) served with Mayo

Sesame Crusted Tuna Steak (on the right) served with Mayo

The recipe was super easy, and though Ahi tuna steaks in Winnipeg are not cheap, I was able to master a favourite fish at home and impress my guests. Now I can now cross that to-do off my bucket list and try some other types of fish at home in 2013.

The two huge Ahi tuna steaks were much more food than the 4 of us could eat for dinner. Thankfully, my dear husband liked the fish, which had the same consistency as his favourite, Prime Rib roast. I was very worried that he wouldn’t like the rare sear on the fish as he’s not a fan of sashimi like I am. The next day for lunch we decided to make a gourmet salad using the leftovers and this is what I came up with.

My DIY dinner salad platter for two.

My DIY dinner salad platter for two.

This was my riff on Salad Nicoise with homemade feta, parboiled baby potatoes, quick-steamed green beans, avocado, grape tomatoes, fresh mint, sliced shallots and of course… the leftover tuna. I drizzled it with my favourite Kraft Calorie-Wise Balsamic dressing for a quick finish, and boy was it delicious!

All dressed up and ready to eat!

All dressed up and ready to eat!

Whenever you have some great leftover protein in your fridge (chicken, steak, pork, fish) and a hodgepodge of vegetables, I do recommend giving this easy meal idea a try.

___________________________________________

Do you ever cook fresh Tuna?
Please share your favourite recipe in the Comments section.

How to Lose 7+ Pounds in Two Weeks… Mall-Walking!

Standard

Weight Release Update #1 – I have the same New Years’ Resolution as most people… to take off a bit of weight. 2012 was a rough year for me, and having just recovered from surgery last Fall, I was keen to get moving again.

Like Nike says... "JUST DO IT" - strap on your runners and go!

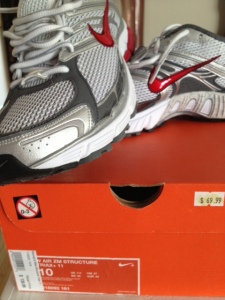
Like Nike says… “JUST DO IT” – strap on your runners and go!

So I hit the ground ‘walking’ on January 2nd, and so far I’ve logged  45 kms of walk-time in a nice warm environment – at the mall, NOT the gym. I’ve been meaning for weeks to post about this Resolution, and to introduce some of my “weight-release” strategies to my readers – so here goes…

I was quite successful three years ago in losing 50+ pounds, but due to some pesky, ongoing health issues, it’s time for me to re-commit to staying in shape.

To better describe my philosophy of weight release vs. weight loss, you have to think of what you want to do when you lose something – like your car keys, or your wallet.

You keys and wallet are important things to find if you've lost them, but extra pounds... they can stay lost in my books.

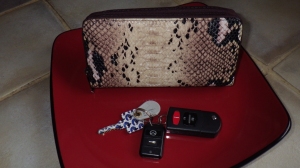
Your keys and wallet are important things to find if you’ve lost them, but extra pounds… they can stay lost in my books.

You really want to find them again, and put them in your pocket, don’t you? So why do we call it Weight Loss? Do you REALLY want to find those pounds again??? I think not. So this year I’m practicing a mind shift on my self-talk, and selecting to release my extra weight, with the hopes that I will never, ever find it again!

As I’m not much of a gym-joining type of person, I decided to think ‘outside the box’ in regards to my daily fitness routine. I was invited by a very active girlfriend to mall-walk before Christmas. I SO enjoyed the experience that I thought I’d make mall-walking my new, four times a week habit. So here’s my story on how I lost 7+ pounds in the first two weeks of 2013.

On January 2nd at 7am, I walked through the doors of Winnipeg’s Polo Park Mall, not knowing what to expect. But I knew “if it was going to be, it was up to me”.

I’ve never been shy of meeting strangers, or of doing stuff by myself, so it was with a positive attitude, a friendly smile on my face, and my trusty pedometer that I set off on a new fitness adventure. I checked my coat, slipped in my iPhone ear buds, and took off for a couple laps around the mall.

Did you know that the upstairs “track” at Polo Park Mall
measures 0.5 miles from Moxies to The Bay?

Most local Winnipeggers may not know that Polo Park Mall opens at 7am for mall-walking. You can actually go in and see what happens in the mall in the mornings before the stores open for business – I find it all so fascinating.

Plus you can’t beat the scenery! Window-shopping AND exercising together in one package – sweet! If you’re like me, then striding along on a treadmill, even with a TV to watch, is only interesting for so long. But every day at the mall the windows change, the people change, but the temperature stays constant. AND as a bonus you can learn all about the sales that are happening!

As I’ve already stated, so far in 2013, I’ve walked 45 kms – that’s more than a marathon(42.2kms). Thinking back, I probably didn’t log 45 kms of exercise in all of 2012!

I walk between 45 and 75 minutes per day, about 2 to 4 miles. My current record is 7,795 steps in 75 minutes, which is about 4.18 miles, but my goal is 10,000 steps on each visit. Will you take this challenge with me?

The length of my walk and my motivation depends on my mood, my playlist, and my upcoming morning schedule. But after weighing in last Wednesday, for the 1st time since New Years Day, I was shocked to see that I’d already released 7.4lbs by adopting these five new habits along with my mall-walking. And that was totally motivating to go the extra mile – literally!

So if you like walking, and want to shed a few pounds before the weather here in Winnipeg warms up, please consider joining the Polo Park Mall Walkers Club on Facebook, and come out a few mornings a week to join in the camaraderie. This group is open to everyone, of all ages – the mall-walkers at Polo Park are a very friendly bunch.

We meet upstairs, above centre court, at Club Monaco at 7am Monday to Thursday mornings. If that time doesn’t work for your schedule, then pop into the mall before opening any morning, including Saturdays. They are open to the public for mall-walking 6 days a week at 7am, it’s also easy on your pocketbook if you conclude your walk before 10am when the stores open. And if Polo Park isn’t convenient, then call your local mall and see if they have a mall-walking program, and if not, suggest it to them. Hope to see you at the mall!

Coming Monday: Weight Release Update #2 – Adopt Five New Habits This Month

_____________________________________________________________

Please enjoy my Weight Release Updates, in addition to my healthier LunchFor1 posts.
I hope that my suggestions can help you to shed a few pounds in 2013.

Please keep me posted on your own progress via Twitter, on my Facebook Page,
or by subscribing and following me on my blog. Followers of my blog
will be eligible for special contests which I will reveal soon.

_____________________________________________________________

And feel free to  share your own success stories about your
New Years Resolution and exercise tips in the Comments area below.

Super Easy and Quite Healthy Crock Pot Lasagna

Standard

The last time I was trying to lose weight, the one dinner that I missed the most was Lasagna. I was lucky to find, and adapt, this incredibly, tasty AND healthy version that is quick to put together. You can simply leave the lasagna to cook in your crock pot while you do other things around the house. It makes a great dinner, and as with all Lasagna recipes… it makes an even better lunch!

Quick and easy slow cooker lasagna that can be good to go in just a few minutes

Quick and easy slow cooker lasagna that can be good to go in just a few minutes

Crock Pot Lasagna
(6 servings)

1 Onion, chopped

1 Garlic Clove, minced

1 pound Lean Ground Beef

1 tsp Sea Salt

1 1/2 tsp.  Italian Seasoning, dried

1/4 tsp Crushed Red Pepper Flakes

28 oz Crushed Tomatoes , canned

15 oz  Tomato Sauce, canned

—–

1 cup Part-Skim Ricotta Cheese

1 package Frozen Spinach, chopped

1 1/2 cups Part-Skim Mozzarella, shredded

6 Lasagna Noodles, no-cook variety

1/2 cup Parmesan Cheese, shredded

OPTIONAL: 1 cup Zucchini, shredded & 1 cup Fresh Mushrooms, diced

__________________________________

1. Brown ground beef, onions and garlic with seasonings on stove in pot large enough to accommodate all the sauce ingredients.
To save time on this step I just use 3-4 cups of my usual spaghetti sauce from the freezer.

2. Once the meat is cooked, add the crushed tomatoes and tomato sauce (and optional vegetables). Simmer for 5 minutes.

3. Mix the thoroughly drained spinach with ricotta and 1 cup of the shredded mozzarella in a bowl.

4. Snap your lasagna noodles in half (depending on the size of your crock pot) using the edge of your counter, as shown.

5. Place 1/3 of the meat mixture in the bottom of your crock pot. Then layer 1/2 of the cheese mixture on top. Lay 4 lasagna noodles on the cheese mixture, and repeat all layers one more time.

6. Place the crock pot cover on top, and turn your crock pot on low for 4 to 6 hours.

7. Just prior to serving, turn off your crock pot. Mix 1/2 cup parmesan with 1/2 cup mozzarella, and add to your Lasagna as topping, and let melt for 10 minutes.

What is the secret ingredient in favourite Lasagna recipe?
Please feel free to share your tips in the Comments section below.

Super Easy Salsa

Standard

One of the potluck items I was constantly being asked to bring to work by my co-workers years ago was my Epicure Selections’ Poco Picante Salsa. This SUPER easy Salsa recipe is great for a quick snack, or to add spiciness to any dish you have on the stove for dinner.

This salsa is SO easy and SO delicious that you won't ever buy pre-made salsa again

This salsa is SO easy and SO delicious that you won’t buy pre-made salsa again

Super Easy Salsa

1 – 796mL can Diced Tomatoes

Juice of 1/2 Fresh Lime

2 tbsp Epicure Selections Poco Picante Salsa Mix

Nacho Chips

_________________________________________

1. Drain the can of tomatoes, but catch the tomato juice
as it’s great to cook rice in tomorrow.

2. Place tomatoes, salsa mix and the lime juice into
your food processor and pulse 5 times.

3. Re-drain the salsa one more time, and serve.

It’s really that easy.

Other uses for this salsa…

– Add to cooked rice or quinoa to create a spicy side dish

– Use with your favourite Mexican recipes like my Beef Tacos

– Use as a pasta sauce for a spicy, Italian-Mexican fusion dish

– Marinade and cook chicken breasts in this Salsa

– Use at breakfast with your favourite egg dish

What do you love Salsa on top of?
Are you a fan of the hot stuff? Or do you prefer a more mild Salsa?

Shredded Broccoli Salad

Standard

I don’t remember what inspired me to make this salad a few years ago, but it’s one of my favourite ways to eat broccoli. Not only can you buy broccoli slaw pre-made like I did, but you can also use your broccoli stalks and shred them yourself to create this salad. We love this as a side to just about any meal!

A quick and easy new salad to try that is super healthy

A quick and easy new salad to try that is super healthy

Broccoli Salad
(makes 2 servings)

1 cup Broccoli Slaw

1/2 cup Shredded Carrot

1/8 cup Almond Slivers

1/8 cup Dried Berries

1/8 cup Oil & Vinegar Dressing
(like Kraft Calorie-Wise Balsamic Vinaigrette)

____________________________________

Mix all ingredients together and toss in the vinaigrette. Serve chilled.

Keeps great for 2nd day servings!

Do you use Broccoli Slaw?
What is your favourite recipe?

Healthy Chai Tea Coconut Loaf

Standard
Healthy Chai Tea Coconut Loaf

I don’t know about you, but at this time of year I want to trim down a bit while at the same time enjoying some of my usual favourites in new and healthy ways. Everyone loves a piece of breakfast loaf, however those recipes usually contain tons of fat, carbs and therefore calories – and let’s not mention how much worse the Starbucks, Tim’s and coffee shop treats are for you. However, this recipe has a nice blend of spice, sweetness, fibre all wrapped up in a really great,moist taste. This is a figure-friendly recipe that I absolutely love as it uses no butter nor oil. The batter smells heavenly even before you bake the loaf!

This is a simple, quick and healthy loaf to make

This is a simple, quick and healthy loaf to make

Chai Coconut Loaf
(yields 9 slices)

DRY:
1/3 cups of Quick-Cook Rolled Oats
(or whatever type of oats you have on hand)
1 cup Flour
1 teaspoon Baking Soda
1/2 teaspoon Salt
1 teaspoon Cinnamon
1/2 teaspoon Fresh Ginger, minced*
3/4 cup Splenda Brown Sugar (or 1-1/2 cup regular brown sugar)
1/2 cup Shredded Coconut, unsweetened

You probably have most of these ingredients on hand in your cupboard right now

You probably have most of these ingredients on hand in your cupboard right now

* TIP: I like to peel my fresh ginger and freeze it in a Ziploc bag.
For recipes like this it makes grating a 1/2 teaspoon very easy.

WET:
1 cup Chai Tea, steeped 5 minutes
1/3 cup Applesauce, unsweetened
1 tablespoon Vinegar
1/2 unsweetened Almond Extract
1 teaspoon Vanilla

_____________________________

1. Preheat oven to 350*F

2. Place all dry ingredients in large mixing bowl, and stir together.

3. Add all wet ingredients to the dry ingredients. Combine until just mixed as this is a quick bread so you don’t want to over-mix, or you will get a hard, tough loaf.

4. Grease loaf pan by spraying it quickly with Pam.

This loaf does not rise very much, so feel free to fill the pan right up

This loaf does not rise very much, so feel free to fill the pan right up

TIP: Dress up this loaf for Brunch by doubling the recipe, and baking it in a Bundt Pan. Simply adjust the baking time accordingly.

5. Bake for about 40-45 minutes, or until a toothpick stuck into it comes out clean.

6. Slice and serve as-is without butter or margarine as the flavour is great. It’s best served warm by the way. It’s great after a 10-second refresher in the microwave.

Lots of fibre and tasty goodness in this 'slice of health'

Lots of fibre and tasty goodness in this ‘slice of health’

This loaf freezes wonderfully too! You may want to double this recipe and make two loaves, because you will love this guilt-free treat as a breakfast item or snack. TIP: I freeze the slices individually for quick breakfasts on the go.

What is your favourite loaf to bake?
How do you think you could make your usual version more healthy?

Money-Saving Homemade Spice Rubs

Standard
Money-Saving Homemade Spice Rubs

Save Money in 2013 by Making your Own Spice Rubs at Home

One of the treats that I love to buy for myself at the grocery store are new flavour-combinations in the form of spice mixes. Once upon a time, I was an Epicure Selections rep and sold spices and spice blends to my galpals. The ES spices are awesome, but I soon realized that it was very easy to combine spices to create my own spice blends, and at the same time save money.

Here are four of my current favourites… Lemon-Garlic-Herb, Spicy Paprika, Chili and Curry Rub. Spice up your New Year with spices blended from things you probably already have in your cupboard right now!

These four homemade spice blends are super quick to make and store for months

These four homemade spice blends are super quick to make and store for months

Unlike the other three spice rubs in this series, this rub is best made and used right away as it contains oil and fresh ingredients.

Lemon-Garlic-Herb

(yields 4 tablespoons)

WET:

1 tablespoon Lemon Zest, finely grated

3 Garlic Cloves, minced

3 teaspoons Olive Oil

DRY:

1 tablespoon Tarragon, dried

4 Bay Leaves, dried

1 ½ teaspoons Sea Salt

¾ teaspoon Black Pepper

Place the dry ingredients into your spice grinder (or mortal and pestle) and grind into a fine dust. I love using my Braun Coffee Grinder, which we have devoted to my spice blend creations as we so rarely buy whole bean coffee.

In a small bowl, combine wet ingredients. Add dry ingredients and mix completely.

This zesty rub is ideal for leaner foods such as turkey or chicken breasts, and any flaky white fish such as halibut, cod, or snapper. Next time I’m definitely trying it on halibut!

I’ve used this rub in combination with a package of chunked up turkey breast meat in order to turn them into an easy low-cal turkey kebab meal.

This makes an easy marinade for Lemon Herb Turkey Kebabs

Just use 1 Tbsp. to make an easy marinade for Lemon Herb Turkey Kebabs

Spicy Paprika Rub

(yields 3 tablespoons)

½ teaspoon Allspice, ground

½ teaspoon Cayenne Pepper

1 teaspoon Cinnamon, ground

1 teaspoon Ginger*, ground

4 teaspoons Paprika

2 teaspoons Sea Salt

* If you only have fresh ginger, you will need quite a bit more than 1 teaspoon. Here’s a great article on the subject of ginger substitutions.

I love this rub on salmon! It’s a super, easy way to dress up a very healthy and good-for-you fish. It’s spicy combination would also work on fattier cuts of meat too, including: skirt/flank steak, pork loin, and whole chicken. NOTE: Smoked Paprika would also be very nice in this spice rub too.

But having lived in Vancouver for 13 years, my absolutely favourite salmon marinade is from a bottle. You can usually buy this in the seafood department of any Safeway.

Chili Rub

(yields 3+ tablespoons)

1 heaping tablespoon Chili Powder

2 teaspoons Cumin, ground

2 teaspoons Brown Sugar

1 teaspoon Oregano, dried

1 teaspoon Sea Salt

Mix all ingredients together in a small bowl. I like to transfer the mixture to a 125mL sealed jar for safe-keeping until I need it.

The brown sugar in this spice rub will caramelize on the meat while it cooks and provides a sweet glaze. Try this rub on whole chicken or turkey, pork tenderloin or chops, and most cuts of beef.

Curry Rub

(yields 3+ tablespoons)

4 teaspoons Curry Powder

1 ½ teaspoons Coriander, ground*

1 ½ teaspoons Sea Salt

1 teaspoon Ginger, ground

1 teaspoon Cumin, ground

½ teaspoon Black Pepper

½ teaspoon White Sugar

I’ve been told that this Indian-style rub is exceptional on lamb, however I do not cook lamb, so I like to use it on chicken which I pan fry in a bit of sesame oil and then add some coconut milk to make a nice, creamy sauce. It’s also great on shrimp.

* If using whole coriander seeds, simply pulse them first in your spice grinder until they become dust, then add other ingredients to complete the rub. Same goes for whole cumin seeds, if that is all you have.

What is your favourite Spice Blend/Rub recipe?
Please feel free to share it below in the Comments section.

Spicy Marinated Mushrooms – A Great Holiday Appetizers

Standard

At this time of year it’s a great idea to have a few last-minute appetizers to pull out of your fridge to wow unexpected guests. These marinated mushrooms are super easy to make, and hold well for 3 to 5 days in the fridge, or can try canning them for a longer-lasting product.

Tender, spicy mushrooms for the fungi-fan in your family

Tender, spicy mushrooms for the fungi-fan in your family

Spicy Marinated Mushrooms

1/2 bag White Button Mushrooms, small
2 teaspoons Salt
1/2 Cup Olive Oil
3 tablespoons Rice Vinegar
5 Garlic Cloves, thinly sliced
3 Green Onions, thinly sliced
2 tablespoons Soy Sauce, Low-Sodium
1 teaspoon Crushed Red Pepper Flakes
1 teaspoon Sriracha (or more)

____________________________

1. Boil a large pot of salted water.

2. Place the mushrooms whole into the boiling water for 7 minutes.
I do not recommend washing your mushrooms until just before you are going to cook them – a light washing is fine. I scrub mine 4 at a time in my hands under running water.

2. In a small bowl, whisk together olive oil, vinegar, garlic, green onions, soy sauce, red pepper flakes, and sririacha.

3. Once the mushrooms are done boiling, drain them, and place them into a large resealable container.

4. Pour the liquid over the mushrooms, stir together, and cover with the lid.

5. Let your container sit on your kitchen counter to cool.
Allow the mushrooms to begin their marinading process at room temperature for a couple of hours.

6. Then you can refrigerate your mushrooms, and use as needed.

7. Create an Antipasto Platter by adding Roasted Red Peppers and Roasted Garlic. Serve the mushrooms with on a platter with room-temperature cheeses, deli meats and crackers or baguette.

TIP: The spicy taste is great!!! For a more intense flavour, pull the mushroom stems out of the caps before boiling which will allow the marinade to permeate into the mushroom from the inside.

These little, succulent snacks go well with any appetizer spread

These little, succulent snacks will go well with any appetizer spread you can dream up this Holiday season

Other Uses…

* Diced the marinated mushrooms up and use as a condiment on burgers or beef dip sandwiches.
* Mince them up to use as a mushroom tapenade on french bread.
* Pop off the stems, and pipe in some soft cheese like Boursin for a fancier appetizer.
* They’d be a great accompaniment to any steak.
* Excellent choice for use in any salad, especially to dress up a Caesar salad with fresh tomatoes.

What do YOU like to have with these mushrooms?
Please feel free to share your uses below in the Comments section.

Simple Soup for One

Standard

I arrived home famished after volunteering at Koats for Kids Winnipeg this morning.

Faux Minestrone-a Simple Soup for 1

Having no plan for lunch (ergo nothing to blog about) I saw that I had some stock defrosted in the fridge from supper last night. And after grabbing a few veggies from the crisper, I was able to quickly whip up this very delicious “Minestrone” soup on the fly.

Simple Soup for One Ingredients

Whatever you have on hand is fine

Whatever you have on hand is fine

2-3 cups Broth
1 Carrot, chopped
1 Celery stalk, chopped

1/8 Onion, chopped

1 clove Garlic, minced

1 tsp. Lemon zest

1 tbsp. Sun-dried tomatoes, finely chopped

1 tsp. Dill, dried

2 tbsp. Pasta, cooked

1 tsp. Salt

Tiny Pasta Stars are a quick and easy addition to any soup

Tiny Pasta Stars are a quick and easy addition to any soup

TIP: When I buy a grocery store rotisserie chicken for our Chicken Taco night, I use all the meat I want from the bird, and then put the bones in a small pot of boiling water with 1/2 tsp each of salt, pepper and dried parsley. I boil it for about an hour while my husband and I eat dinner. And once it’s cooled, I put it in a storage container, and freeze it for days like today. No more buying expensive, sodium-heavy, pre-made chicken stock!

_____________________________________________________

1. I boiled the broth in one pot, and cooked the pasta in another. Once the pasta was done, I ran it under cold water and kept it in my strainer. I find that adding grains or pasta to soups makes them thicken up very quickly from the starch content.

You do not need a lot of broth, about 2 cups is good.

2. Add whatever vegetables you’ve got in the fridge to the broth, and pick one or two “wow” ingredients like lemon zest or sun-dried tomatoes. Whatever you have on hand is fine – black beans, peppers, potatoes, etc., even quinoa or rice in place of the pasta.

3. Cook for about 20 minutes, or until the veggies reach your preferred tenderness. And voila! You have an easy homemade soup for one. Or up-size this idea to feed a crowd at any time of the day.

4. Serve in a pretty bowl to warm your day! And feel good about this healthy, low-calorie, but filling lunch choice.

A spoonful of goodness!

A spoonful of goodness!

What is your favourite soup?

Please let me know in the comments section below what your “wow” ingredients were when you tried this recipe.